Sonntag, 22. April 2012

Tira Ringblade III

It's nearly finished! So it'll be a four-part blog for my Azi Dahaka =)

Next step, I fixed the isolation foam to the hoop. With screws. So simple. I thought that would break, but in fact, it stays on really well.


After that, I smeard the gap between hoop and foam with hot glue. Works well.


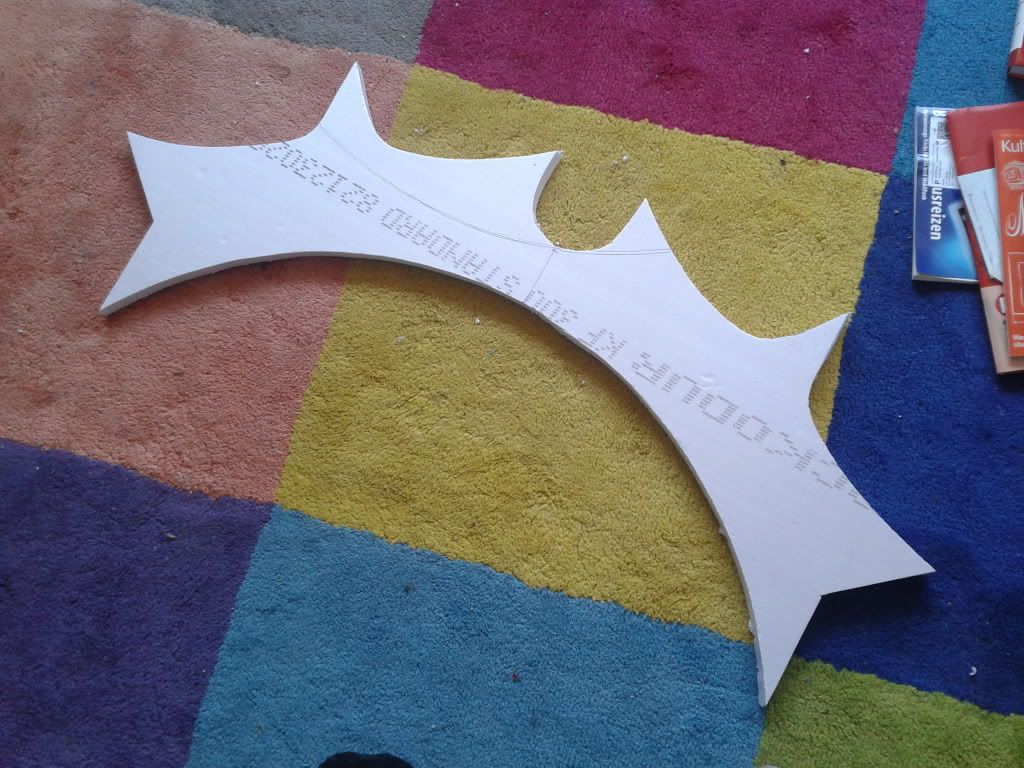
Blades are in place now. The whole thing got covered in paper clay (4 packs of flour-like paperclay). Then, it needs a whole lot of sanding, which was extremly annoying on those big areas, and broke a lot on the outer bevels. I'm not completely satisfied here.


After paperclay and sanding, they got covered in gesso so that they are all white.


Now, all blades are spraypainted in silver. They look a little like inverted klingon Bathlets now >.<


Before adding the ornaments, I shaded the blades a little with acrylic paint.


For the copper looking pieces, I decided to cover them in a similar looking fake suede. I thought of places in the sword that would be more comfortable to touch for Tira.
The ornaments are made of craftfoam, and I used the same method as in my Fran Helmet. They were painted golden later - which will be in my next post =)

Montag, 16. April 2012

Tira Ringblade II

Here's the next post of my lovely Ringblade =)

After a cardboard failure, I chose to work with my all-favourite weapon material: isolation foam. It's similar to styrofoam, only smoother. If anyone knows the exact term in english, let me know. In german it's Styrodur or Jackodur.
The material comes in various strengths, I used 2cm in thickness. In the picture is a variant with a smooth surface, but actually I found that the structured one was  easier to work with (see 2nd picture).


Before I affixed this to my hoop, I shaped the blades. My lovely boyfriend thought of something really cool there.
First, I drew a line where the bevel (Term?) was to begin:


Then I put backing paper over it...


Now....let's iron it^^


The foam will melt and can be pressed down. The advantage over cutting the blades ist that there won't be any material loss, and it makes the spikes sturdier.


Please do this outside or in a well ventilated room. It stinks and the fumes are bound to be poisonous >.<

Well, that was the blade-shaping part. Stay tuned for fixing it to the hoop and loads of paperclay.

Dienstag, 10. April 2012

Tira Ringblade I

I am currently working on a Tira costume (SC II 2nd Player - the golden one). Of course that requires the absolutely wonderful ringblade weapon she uses. I love that weapon.
The decision of which weapon to chose was rather hard, as I have a little handicap on that: I need to be able to detach it into pieces for transportation.
In the end my choice fell on one of the new weapons from SC V - Azi Dahaka.

As many people do, I started out with a hula hoop, that was cut into three parts.


One of the pieces looks different, I'll come to that later.
Of course, they need to be mendable to one. A hula hoop usually is empty inside, so I bought fitting spars (not sure of the term here, round pieces of wood >.<) and hammered them in one side of a piece each. They now can be plugged into each other.


A detail of my "plugs".

Now it's time to make a pattern for the blades. I think the pictures talk for themselves.


I think I'll make the blades a little bigger.
See you next time when I've worked a little further =)

The usual not-very-creative "hello"

I'm now testing Blogger. Before, I used to be on LJ, but somehow they couldn't keep up in developement and style, it's grown really buggy. I'm not saying that I will keep up blogging here, it's just a try-out with blogger.
I'm also not sure what content to post, since blogger, as well as many other plattforms, will take all copyrights right under your nose *sigh.